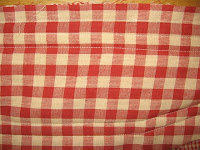
1. When the loops appear, you need to get scrap pieces from your project and layer the scraps exactly as you have your project layered. Include batting if you are using batting in your project. You’re going to use these scraps to place practice stitches on so you won’t have to rip out the stitches and re-do them as you would on your real project.
2. Quick bobbin checks:
a. Is your bobbin wound correctly? Is the bobbin in the holder correctly? To be sure, follow step 2b.
b. Remove the bobbin and the spool of thread. Completely re-thread the machine. Place a few practice stitches onto the scraps. If you still have loops, see 2c.
c. If the bobbin thread is running low (especially on plastic bobbins), replace with a fully threaded bobbin. Place a few practice stitches onto the scraps. If you still have loops, see number 3.
3. UNPLUG YOUR SEWING MACHINE. Refer to your machine manual and remove the cover from the bobbin case and remove the bobbin.
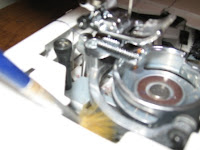
a. Use a small artist’s paint brush to remove lint from the bobbin area. The long handle on the paint brush has more reach than the brush that the machine manufacturer supplies, therefore you can easily get into those hard-to-reach areas. Plus the lint will stick to the bristles of the paint brush better.
b. Twirl the paint brush around to remove lint from the smooth surfaces inside the bobbin casing. Remove lint from the brush often.
c. Gently brush any lint from the gears. Slowly turn the hand crank to be sure you clean all the way around the gears. Any dust trapped in the gears will cause loops. Again, remove lint from the brush often.
Visit http://www.patternmart.com/ to find your next sewing project.

Click on the picture above for a larger view to see the loops on the top right side of the stitches on this project.


The gear on this sewing machine is behind the bobbin holder as seen in the picture above.


No comments:
Post a Comment